

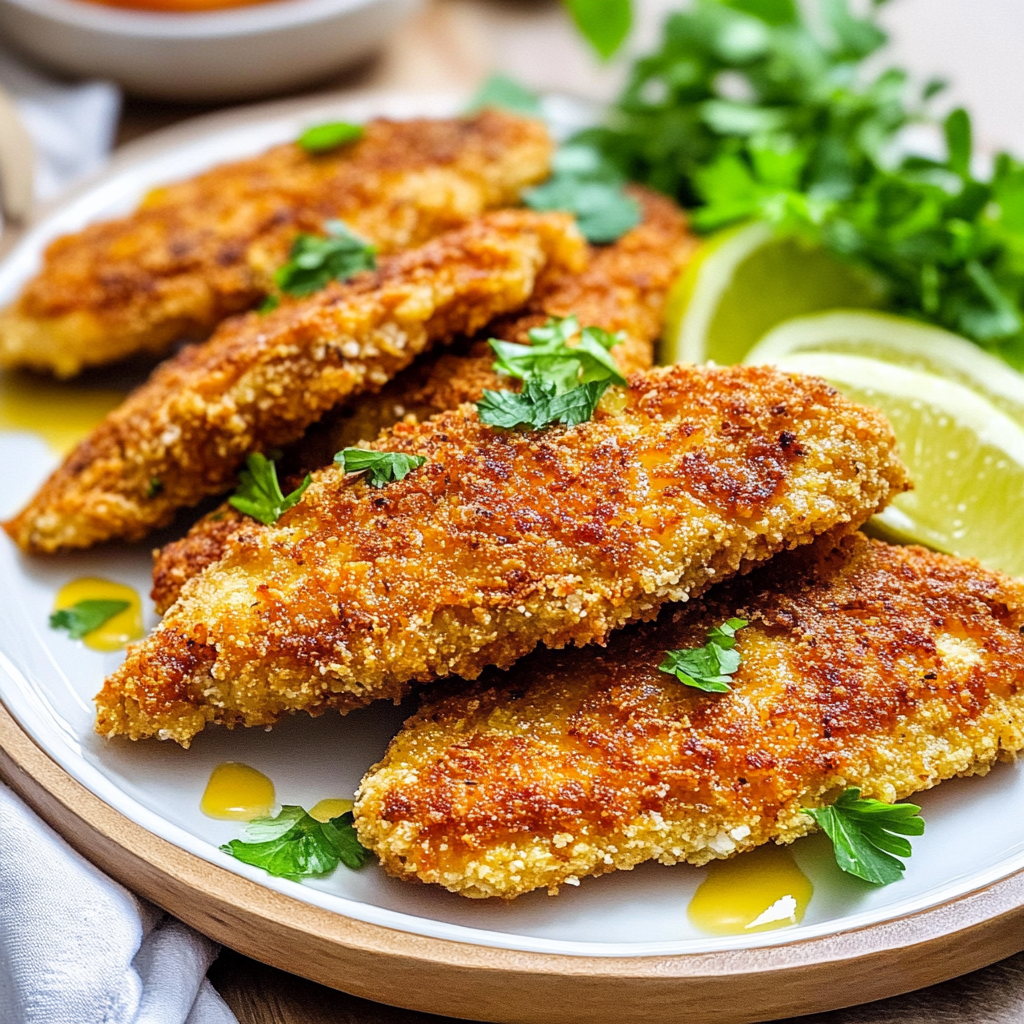
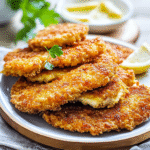
Crispy chicken cutlets are the culinary equivalent of a warm hug on a rainy day. Imagine sinking your teeth into a perfectly breaded piece of chicken, golden and crunchy on the outside, while juicy and tender on the inside. The aroma wafts through the kitchen, making you feel like a gourmet chef, even if your cooking skills are more “microwave magicians” than “Iron Chefs.” This dish is ideal for almost any occasion, whether you’re hosting a dinner party or just trying to impress your cat.
Let me take you back in time when I first attempted crispy chicken cutlets at a friend’s potluck. I was convinced that my culinary prowess would shine brightly—until I discovered that frying chicken was akin to juggling flaming torches while riding a unicycle. Spoiler alert: it didn’t go well! But with practice comes perfection. Now, crispy chicken cutlets are my go-to when I want to dazzle guests or simply enjoy comfort food that brings back fond memories.
Why You'll Love This Recipe
- This recipe offers effortless preparation without sacrificing flavor or texture.
- The cutlets are visually stunning with their golden crust and can be served with various sides.
- Enjoy them as a main dish or slice them for salads and sandwiches.
- Perfect for family dinners or entertaining friends!
Ingredients for crispy chicken cutlets
Here’s what you’ll need to make this delicious dish:
- Boneless, Skinless Chicken Breasts: Approximately 3-4 chicken breasts will do, depending on how many guests you have or how hungry you are.
- All-Purpose Flour: Essential for dredging; it creates a base layer that helps the egg wash adhere.
- Eggs: Two large eggs will help bind the breadcrumbs to the chicken; use fresh ones for better flavor.
- Breadcrumbs: Panko breadcrumbs give that extra crunch; feel free to use regular breadcrumbs if that’s what you have.
- Salt and Pepper: Season generously; these two simple ingredients elevate the flavor profile significantly.
- Olive Oil: For frying; ensure it’s good quality for optimal taste and health benefits.
The full ingredients list, including measurements, is provided in the recipe card directly below.
How to Make crispy chicken cutlets
Follow these simple steps to prepare this delicious dish:
Step 1: Prepare Your Chicken
Start by placing your boneless, skinless chicken breasts between two sheets of plastic wrap. Use a meat mallet (or an empty wine bottle—you’ve got options) to pound them gently until they are about half an inch thick. This helps them cook evenly while ensuring that they remain juicy inside.
Step 2: Set Up Your Dredging Station
In three separate shallow bowls, set up your dredging station: one with all-purpose flour (seasoned with salt and pepper), one with beaten eggs, and another filled with panko breadcrumbs. This assembly line will make your life so much easier—and less messy!
Step 3: Dredge Those Cutlets
Take each flattened chicken breast and dip it first into the flour mixture, then into the egg wash, followed by the breadcrumbs. Make sure each piece is fully coated—like getting dressed for a formal event but way more delicious.
Step 4: Heat Your Oil
In a large skillet over medium heat, pour enough olive oil to cover the bottom of the pan generously (about half an inch). Allow it to heat up until shimmering but not smoking—nobody wants burnt cutlets!
Step 5: Fry Until Golden
Carefully place your breaded chicken cutlets in the hot oil without crowding them. Cook each side for about 3-4 minutes until they turn golden brown and crispy. If you’re feeling adventurous, try flipping them with flair—just don’t drop them!
Step 6: Drain and Serve
Once cooked through (internal temperature should reach 165°F/75°C), transfer the cutlets onto paper towels to drain excess oil. Serve hot with lemon wedges or your favorite dipping sauce for added zing.
Transfer to plates and drizzle with sauce for the perfect finishing touch.
Now that you have mastered crispy chicken cutlets, revel in your newfound culinary fame! Whether you choose to pair them with mashed potatoes or toss them onto a salad, these delectable bites promise satisfaction every single time. Remember—every great chef started somewhere; now it’s your turn!
You Must Know
- This amazing crispy chicken cutlets recipe offers more than just flavor; it makes meal prep a breeze.
- You can easily customize the ingredients based on what you have on hand.
- The vibrant colors and aromas make it visually stunning on any dinner table.
- Perfect for frying but versatile enough for baking or air frying.
Perfecting the Cooking Process
To achieve crispy chicken cutlets, start by breading the chicken first. Then, heat your oil while prepping the sides. Once everything is ready, fry the cutlets until golden brown for that perfect crunch.
Add Your Touch
Feel free to swap out the breadcrumbs for crushed cornflakes or panko for extra crunch. You can also experiment with different spices like paprika or Italian seasoning to give your crispy chicken cutlets a unique twist.
Storing & Reheating
Store leftover crispy chicken cutlets in an airtight container in the fridge for up to three days. To reheat, place them in a preheated oven at 375°F (190°C) for about 10-15 minutes to restore their crispiness.
Chef's Helpful Tips
- Ensure your oil is hot enough before frying to prevent soggy cutlets.
- Use a meat mallet to flatten chicken evenly for uniform cooking.
- Lastly, let the fried cutlets rest on paper towels to absorb excess oil and maintain that crisp texture.
The first time I made crispy chicken cutlets, my friends declared it “the best thing since sliced bread.” I still chuckle thinking about their dramatic reactions as they devoured every last bite!
FAQs :
What are the best tips for making crispy chicken cutlets?
To achieve perfectly crispy chicken cutlets, start by using thin, evenly sized pieces of chicken. Marinate the chicken in buttermilk or a seasoned brine for extra tenderness and flavor. Use a three-step breading process: first, coat the chicken in flour, then dip it in beaten eggs, and finally cover it with breadcrumbs. For an extra crunch, consider mixing panko breadcrumbs with regular ones. Fry the cutlets in hot oil to create that desirable crispiness and drain them on paper towels to remove excess grease.
Can I bake crispy chicken cutlets instead of frying?
Yes, you can bake crispy chicken cutlets as a healthier alternative to frying. Preheat your oven to 425°F (220°C) and place the breaded chicken on a baking sheet lined with parchment paper. For optimal crispiness, spray the cutlets lightly with cooking oil or use melted butter before baking. Bake for about 20-25 minutes or until the internal temperature reaches 165°F (74°C). Baking may not achieve the same texture as frying, but it will still yield delicious results.
How do I store leftover crispy chicken cutlets?
To store leftover crispy chicken cutlets, allow them to cool completely before placing them in an airtight container. You can keep them in the refrigerator for up to three days. To maintain their crunchiness when reheating, place them on a baking sheet and reheat in the oven at 375°F (190°C) for about 10-15 minutes. Avoid microwaving the cutlets, as this method tends to make them soggy rather than crispy.
What can I serve with crispy chicken cutlets?
Crispy chicken cutlets pair well with various sides that complement their flavor and texture. Consider serving them with a fresh salad for brightness or creamy mashed potatoes for comfort food vibes. You can also pair them with steamed vegetables or pasta tossed in olive oil and garlic. For added flair, drizzle your favorite sauce over the cutlets—such as marinara or garlic aioli—to elevate the dish even further.
Conclusion for crispy chicken cutlets :
In summary, crispy chicken cutlets are both easy to make and incredibly versatile. Using proper techniques like marinating and following a detailed breading process ensures that your cutlets come out perfectly crunchy every time. Whether you choose to fry or bake your chicken, these delicious cuts can be paired with various side dishes for a complete meal. Don’t forget to store leftovers properly to enjoy this tasty dish again later!
Crispy Chicken Cutlets
Crispy chicken cutlets are a delightful comfort food, featuring a golden, crunchy exterior and juicy interior. Perfect for family dinners or casual gatherings, they are sure to impress.
- Prep Time: 15 minutes
- Cook Time: 15 minutes
- Total Time: 30 minutes
- Yield: Serves approximately 4
- Category: Main
- Method: Frying
- Cuisine: American
Ingredients
- 3–4 boneless, skinless chicken breasts
- 1 cup all-purpose flour
- 2 large eggs
- 1 cup panko breadcrumbs
- Salt and pepper to taste
- 1/2 cup olive oil (for frying)
Instructions
- Prepare Your Chicken: Place the chicken breasts between two sheets of plastic wrap. Use a meat mallet to pound them until they are about half an inch thick for even cooking.
- Set Up Your Dredging Station: In three shallow bowls, place the flour (seasoned with salt and pepper), beaten eggs, and panko breadcrumbs.
- Dredge the Cutlets: Dip each flattened chicken breast into the flour mixture first, then into the egg wash, and finally coat with breadcrumbs. Ensure each piece is fully coated.
- Heat Your Oil: In a large skillet over medium heat, pour enough olive oil to cover the bottom generously. Heat until shimmering but not smoking.
- Fry Until Golden: Carefully place the breaded cutlets in the hot oil without crowding them. Cook for about 3-4 minutes on each side until golden brown and crispy.
- Drain and Serve: Once cooked through (internal temperature should reach 165°F/75°C), transfer the cutlets onto paper towels to drain excess oil. Serve hot with lemon wedges or your favorite dipping sauce.
Nutrition
- Serving Size: 1 cutlet (150g)
- Calories: 380
- Sugar: 0g
- Sodium: 250mg
- Fat: 20g
- Saturated Fat: 3g
- Unsaturated Fat: 16g
- Trans Fat: 0g
- Carbohydrates: 30g
- Fiber: 2g
- Protein: 24g
- Cholesterol: 180mg
Keywords: For extra crunch, mix panko breadcrumbs with crushed cornflakes. Try adding spices like paprika or Italian seasoning to customize flavors. Store leftovers in an airtight container in the fridge for up to three days; reheat in a preheated oven for best results.
Leave a Comment